From the browser to a finished vessel in five steps
Configure the vessel, print the six parts, pour the silicone once, push the master out, cast. The order below is the order in the README of every kit; the quantities and settings come with your files.
About 5 days end to end, most of it printing and curing; a few hours of hands-on work
- PLA or PETG filament, roughly 300 to 400 g for an 80 mm candle jar kit
- Pourable mould silicone, Shore A 15–25, tin-cure recommended: the README gives the millilitres and grams for your kit (about 470 ml to buy for an 80 mm jar)
- 1 × M5 × 12 countersunk screw and 1 × M5 nut
- 1 × 4 mm × 16–20 mm self-tapping screw (bridge to core)
- 4 × 25 mm binder clips
- Non-silicone release spray (Ease Release 200 or similar)
- Hot glue or tape to seal the bottom edge of the frame
- Fine concrete, rapid-set CSA cement or Jesmonite AC100, about 420 g per 80 mm jar; pigments if you like
- FDM 3D printer with a 220 × 220 mm bed
- Kitchen scale (1 g resolution) and mixing cups
- Sandpaper 240 to 600 grit and a sealer for the master
- Vacuum chamber (recommended) or a steady hand to pour in a thin stream
- Spatula or straight edge, orbital sander or anything that vibrates
- Wet-and-dry paper and a sealer for the finished vessel
- 1
Configure the vessel in the studio
Open the studio, free and without an account. Start from one of the presets, grouped in six families: candle jars, planters, vases, trays and dishes, cups, desk and storage pieces. Then set what you need: footprint and dimensions, height and plinth, wall thickness, cavity shape and depth, wick socket (⌀23 mm for a wood-wick clip, 15 or 12.5 mm for a cotton-wick tab, 0 for none), drainage hole, relief and its depth. The capacity in ml and oz, the silicone volume and the concrete mass update live, and the 3D preview shows the kit parts around your vessel. The studio warns you if a wall is thinner than 4 mm, if the core would be too small or if a relief is too deep for the wall.
- Any modern browser
Iterate as long as you like: nothing is charged until you generate the files, and each generated kit is a separate purchase.
- 2
Generate the kit and print the parts
Download the kit — free during the launch. Your browser makes the kit from your exact parameters and the ZIP is yours from the confirmation page and from the link in your email.
- FDM printer
- Slicer
- Sandpaper and sealer
The fits are tight on purpose (0.15 to 0.3 mm). If a part does not go together, lower your flow by 2 to 4 % and reprint it; do not file it.
- 3
Assemble the kit and pour the silicone
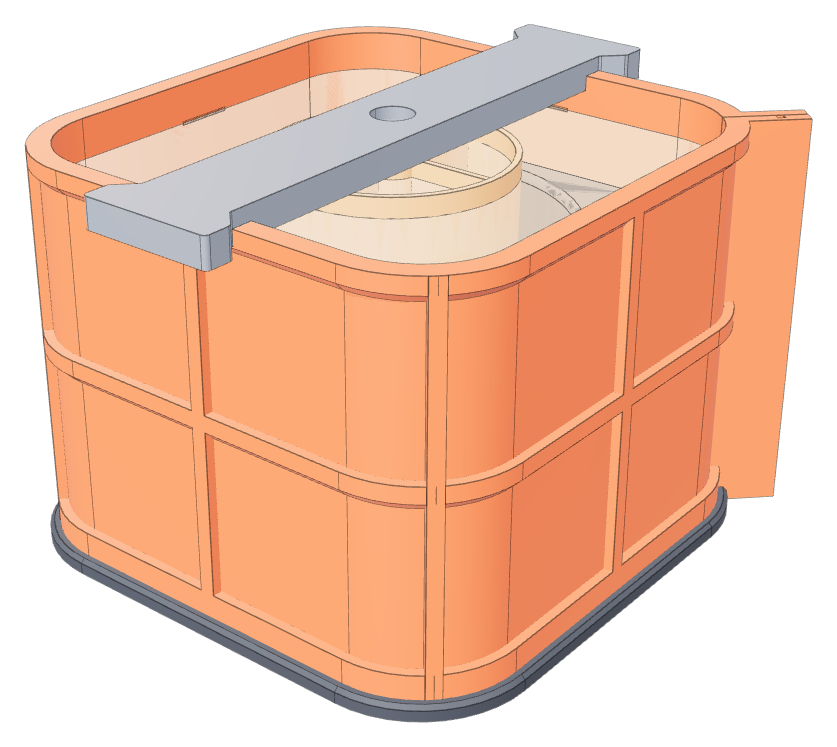
Press the M5 nut into the pocket under the master. Seat the master in the base-plate recess, pattern facing the front, and screw it from below with the M5 × 12: it can no longer float. Open the formwork at its split, wrap it around the base plate so the flanges drop into the notch, close it so the tongue enters the groove, and put two binder clips on the flanges. Seal the outside bottom edge with hot glue or tape. Screw the bridge onto the core, lower the core into the master cavity so the bridge ends drop into the rim pockets, and clip the bridge ends to the formwork: a hollow core floats otherwise. Spray release agent on everything. Weigh the silicone from the README, mix, degas, and pour in a thin stream into one corner up to the engraved pour line: it rises around the master, covers its rim and fills the cavity around the core. Nothing must flow into the core. Let it cure for the time on the datasheet, 6 to 24 hours for tin-cure.
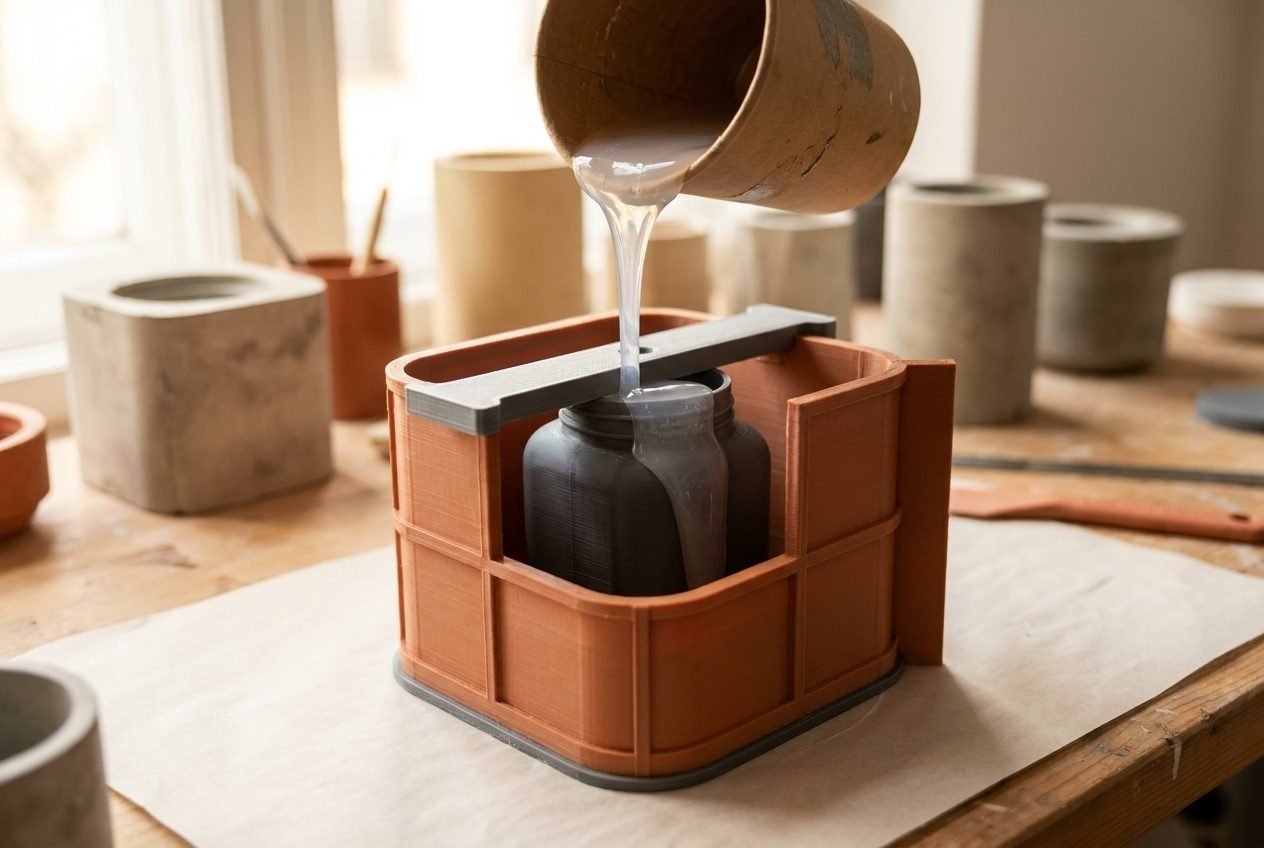
Step 3 — the silicone rises around the master and over its rim up to the engraved pour line, in a single pour. Illustration. - Scale
- Mixing cups and stick
- Vacuum chamber or patience
- Release spray
- Hot glue
Work at 20–25 °C and do not demould early: a cold garage can double the cure time, and an early demould is the surest way to tear a mould.
- 4
Demould the master
Unscrew the bridge and pull the core out of the silicone sleeve with a slight twist. Remove the clips, open the formwork at its split and slide it off. Flip the block, unscrew the M5 from below and lift the base plate away; push through the plate holes with a rod if it sticks. Push the master out through the bottom opening: the silicone stretches around the plinth to let the wider body pass, and a few drops of soapy water help. The inner sleeve stays attached to the block by the layer of silicone over the rim. Trim the thin flash left by the split with a sharp blade.
- Screwdriver
- Hex key for the M5
- Sharp blade
You now have a one-piece silicone mould with an attached inner sleeve, a rigid core to stiffen it and a frame that doubles as a counter-mould. Keep the master: a fresh sleeve or a fresh mould is just another pour.
- 5
Cast the vessel and finish it
Put the rigid core back into the sleeve, then the silicone block back into the clipped formwork on the base plate, with the opening (the bottom of the vessel) facing up. Mix the concrete or Jesmonite to the quantity in the README and pour it while vibrating the frame, tapping or holding a sander against it, to chase the bubbles. Screed the bottom level with the silicone, or press the base plate upside down onto the fresh mix: its recess gives a perfectly flat plinth and the central disc a slightly hollowed foot. After 12 to 24 hours, remove the bridge and the core, flex the silicone to release the vessel, then peel the sleeve out of the cavity. Let it dry for 48 hours, sand the bottom flat and seal it. For a candle, glue the wick clip into the socket, rest the bow-tie tool on the rim to hold the wick straight, pour the wax and trim the wick to 5 mm.
- Mixing jug
- Spatula
- Sander or vibrating table
- Wet-and-dry paper
- Sealer
Jesmonite and plaster come out in 30 to 60 minutes; rapid-set cements in an hour, though a thin rim prefers a night in the mould. Light candles only once the vessel is bone dry and sealed inside.
Your next vessel is one evening of printing away.
Configure it in the studio, print the kit tonight, pour silicone tomorrow.